2013-12-22

Tackling Face Issues | Everyday Make Up


So we all have things about our faces that we're not crazy about, whether it's a birthmark, acne scarm a nose that's too long, short, nig, narrow, eyes too far apart, too close, too small, too big... I go through stages of being obsessed with my nose. Watch a video, it's such a weird shape from the side!

It's common to fixate on a feature that seems less desirable and decide that it's the thing that's stopping you from being beautiful. The most beautiful faces are the ones composed of features that are most interesting, not the most perfect. Think how boring it would be if we all looked the same.

So, in this blog post I will be telling you (with help from research and friends in the beauty industry) how to fix these little so-called flaws. 

Concealing A Blemish

If you have a whitehead, resist the urge to pop it, particularly if you're heading out to door. (If you REALLY need too, here's a link to a post telling you how:

Instead hold a wet, hot flannel or washcloth over it for at least a minute and then gently rub off the whitehead without inflaming it. Mist your face with toner and let it dry. Apply foundation and then assess what it needs to be covered. Using a concealer brush (thin and pointed) dab a small amount of concealer (the exact shade of your skin) on the blemish in a quick swirling motion. Blend away the edges with your finger and then set it with a powder. If you really can't get coverage with standard make up because you have severe or cystic acne, you can buy theatrical make up. Just be sure you remove it every night. 
Jennifer Aniston Thin Lips
Jennifer Aniston


Making Thin Lips Look Fuller

You have to be very careful not to make your lips look visibly drawn on - or like your lipstick was badly applied. In general, shimmery lip gloss is going to be your best friend, since it will reflect a lot of shine and create an illusion of a bigger mouth. Look for a shimmery or pearled gloss, and apply it to the fullest part of your lips, which will be the middle of your mouth, by dabbing some in the center of your bottom lip and then pressing it up onto your upper lip.  
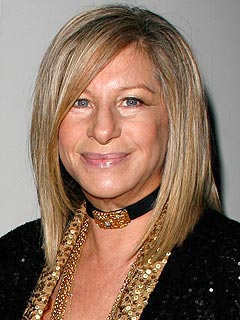


Barbra Streisand

Making A Wide Nose Look Narrower

This is where a correctly applied contouring job will be a huge help. 

1. After you apply your foundation, using the same brush or sponge, take a foundation that's one or two shades darker than your natural shade and apply it to both sides of your nose in a straight line starting at each brow and continuing down to the tip. 

2. Take a bit of the highlighter and dot it down the bridge of your nose; blend with your finger. 

3. Using a foundation brush, blend with swirling motions until you cannot see any lines. 


Megan Fox
Bringing Forward Deep Set Eyes

You need to do an artful mix of darker shadows and highlights to bring parts of the eye forward and set others back.

1. Apply a highlighter across your entire lid.

2. Use a light shadow on the bottom of your lid.

3. Apply a darker shadow in the crease. 

4. Apply translucent powder to set the colour and prevent it from congregating in the crease. 

5. Line your eyes and add mascara on the top lashes only - liner and mascara on the bottom lashes can make the eyes appear smaller. Plus, the deeper your eyes are, the more those bottom lashes hit your skin and could cause mascara to run. 


Making Close Set Eyes Look Wider

SJP
They key here is to add emphasis on the outer corners of your eyes.

1. Cover entire lid with a light eye shadow all the way to the brow bone. 

2. Add highlighter to the inner corner of your eye to brighten up the area. 

3. Take a slightly deeper eye shadow colour and apply it fromt he middle of your eye out to the outer corner. Stop short of the brow bone. 

4. Start your eyeliner from the inner corner, but keep it thin. Slowly thicken the line as you get closer to the outer corner and wing it out. 

5. Apply mascara, with extra emphasis on the outer lashes.


Making Wide Eyes Look More Close Set

Create extra definition in the inner corners of your eyes to offset their wideness.

Kate Moss
1. Cover the entire lid with a light eye shadow, all the way to the brow bone. 

2. Add highlighter to the outside half of your eye, starting directly under the brow bone and going all the way to the lash line.

3. Apply a slightly darker shade in a half oval in the inner corner of your eye. 

4. Keeping it nice and and skinny, use a liquid eyeliner across the entire upper lash line. 

5. Apply a thin, two-centimeter long strip or liquid liner along the lower lash line. 


Michelle Trachtenberg


Wearing Eye Make Up With Glasses

Contrary to what you might think - that glasses would hide your make up - they might actually make it look more pronounced, so keep it simple but bold. Skip eye shadow and rely on a liquid liner for a heavier line, an eyelash curler and some mascara. 

Highlighting and Contouring | Everyday Make Up


Highlighting and contouring are two methods that are often skipped, but if done correctly they're pretty powerful. They can make your face look more symmetrical, both accentuate and downplay your features and generally define and brighten your face. If you've ever taken an art lesson, the same principles apply here. Adding shadows makes things look farther away, adding reflective, light areas makes something look closer. 

 
Image froblog.womenshealthmag.com

Contouring
(The Brown Lines)

This can bring out cheekbones, create a more defined chin and streamline your nose. For subtle contouring use bronzer, for staying power sue foundation three shades too darker than your usual foundation,

Highlighting
(The White Lines)

This brightens up eyes, makes your cheeks pop and helps define your upper lip area. Some highlighters just add a hint of brightness whilst others bring a shimmer to your face.

2013-12-20

If You Have A Dark Complexion | Everyday Make Up


   The key is to find a red-based foundation that is warm and not ashy - you don't want to look washed out and grey. Bobbi Brown and Iman make the best foundation options for dark skin. 
Rihanna - Dark Complexion
TOOLS: Foundation Brush, Eye Shadow Brush, Powder Brush. 

PRODUCTS: Foundation, Cream Blush, Eye Shadow, Eyeliner, Mascara, Lip Liner, Lip Gloss.

Step One: Apply your foundation evenly over your entire face.

Step Two: Smile into a mirror so you can find the apples of your cheeks and apply your cream blush with your foundation brush on the apples and along your cheekbones. 

Step Three: Wet your eye shadow brush and mix it with a light coloured (champagne) eye shadow to create a paste. Apple the shadow in an even layer over your entire lid. Try a light shimmer eye shadow for daytime looks.

Step Four: Apply your eyeliner to the top lash line. A dark metallic colour is nice such as a bolt silver or a rust. 

Step Five: Brush some mascara onto your top lashes only.

Step Six: Lightly apply light layer of powder in the same shade as your foundation. 

Step Seven: Define your lip line with a lip liner that is the same colour as your lipstick or gloss. When you're applying it, make sure to follow your natural lip line. Finish with a gloss.

2013-12-19

My Style Icons | Style Picks


As you can probably tell, every now and again I let you take a break from my 'Chapters' and add the odd bit of 'this and that' into my blog! (Just keeping you on your toes!) Today is yet another picture post, (not complaining though) showing you my TWENTY, yes twenty current style icons. Let me know if you agree with my choices. 


My first five. Mary-Kate Olsen has amazing style. She can do no wrong. Whether she is clashing bold prints, simple separates or sporting amazing accessories or just rocking an all black ensemble  she is style perfection. Cara Delevinge two words for this girl - adore her. Cara gets top marks for her off duty dressing, her skinnies, combat boots and leather jacket. Urban sophistication. Este Arielle is one of the three coolest sisters in music. Her flowing hair, her mix of western and grunge is something I love. Definitely have a listen to her song - forever. Dakota Fanning is a big fan of Rodarte, and I'm a big fan of her! She has a fresh face, fairytale blonde hair and ethereal style, she will always be in my style icon list. If Georgia May Jagger knows anything, it's how to work red lips, tousled hair and a cute cocktail dress. Love. 


Next five. Beyoncé is at her style peak right now, especially in her latest video! (Drunk In Love Feat Jay-Z) She always rocks figure hugging dresses with a twist. Who runs the world? Zooey Deschanel is my ultimate fashspiration, and I love this floral dress on her. The edgier of the K-Dash clan are ambassadors for fresh faced, young fashion, and Kendall Jenner is definitely doing that. Gorgeous hair, and pins! Emma Watson always knows how to dress to impress whilst still remaining sophisticated as ever. 


Third Five. Queen of noir, Rooney Mara shows why we call her the Queen of Noir in this dress. Spot on trend. It's just too much that we have young Hollywood starlet Chloë Moretz's style to crush on. I love her green and black dress here, so cute. Olympia Campbell always works in a nice country style vibe which I dig. I love Bip Ling's wild style. She's quirky and edgy and something a little different. 


The folk band 'The Chaplin Sisters' from New York are new on the scene but sister, Abigail Chaplin wears a bang on style peachy lace ensemble - she's made it so much better with tousled hair and a red lip. The K girls are always looking polished but in my opinion, Kim Kardashian is always my favourite. Her impeccable grooming is always so impressive. Bohemian beauty Vanessa Hudgens is one of my favourites for festival style inspiration, but her street look is also so impressive. I've had my eye on the blonde Sienna Miller like a hawk since Twenty9Twelve hit the shelves, but she could make a bin bag look good. I love her in her out there dress, it's a bit different, but I love it. 


Last lot! Honest. The blonde 90210 star, Annalynne Mccord is stunning, love her effortless country style. I love Claire Courtin-Clarins, someone I've recently been introduced too but her and her sisters are a pack of four fashionistas. Last, but not least, Maggie Gyllenhaal gets maximum points. She's simple but stylish and sleek. Love her, look out for her brother too!

Comic Print Shoes | *Christmas* Style Picks


Comic/Cartoon prints are so fun to wear, if you're brave enough that is. It's something that you can try, whether you're going to wear it as trousers, dress or a clutch. I'm currently loving the printed shoes and that is what I've picked to showcase this Christmas. Why not wear one piece to your work Christmas party, that'll show them how fashionable you are..


Crop Tops | *Christmas* Style Picks


When is there a more perfect time to wear a crop top than Christmas parties? You can style them so many different ways; wear matching bottoms, with a pencil skirt or clash it with other prints to turn heads. However you do it, here are nine of my favourite ones from on the high street!


2013-12-18

If You Have A Monolid | Everyday Make Up


Jennifer Ushkowitz - Monolid
Many Asian women (although not only Asian women) had single eyelids, which means there's no crease and their eyelids grow pretty much straight. Getting flawless eyes requires a few modifications to everyday steps. 


TOOLS: Lid Brush; Crease Brush; Eyelash Curler.

PRODUCTS: Eye Shadow; Eyeliner; Mascara.

Step One: With a lid brush, sweep a light taupe shadow over the entire eye area.

Step Two: With the same brush, sweep a medium taupe shadow from the lash line to midway up the lid.

Step Three: With a crease brush, sweep a warm brown shadow along and just about where the medium taupe stops, starting at the outer corners so most of the colour is focused there.

Step Four: Line the upper lash line with a think dark brown or black eyeliner and the blend it down into your lashes with your finger.

Step Five: Use a lash curler to curl your lashes. Place the curler at the base of your lashes and squeeze gently but firmly. Hold for a few seconds, then release and inch it out, squeezing and holding a couple more times. 

Step Six: Add a coat of mascara to your top lashes only then follow my steps from my blog post here for face, cheeks and eyes:

2013-12-04

Everyday Looks Video | Everyday Make up


My usual look involves low key features and a strong eye (thanks to gel eyeliner). I've gotten it all down to a science and never spend more than ten minutes in front of the mirror. 


TOOLS: Foundation Brush; Concealer Brush; Powder Brush; Angled Contour Brush; Eyebow Spoolie.

PRODUCTS: Foundation; Concealer; Under Eye Concealer; Translucent Powder; Bronzer; Cream Blush; Liquid Liner; Mascara; Chapstick.

Step One: With a foundation brush, take your foundation and blend evenly across your entire face and neck. 

Step Two: Load up a brush with concealer in your exact shade and pat onto any blemishes. Pat a light under eye concealer below your eyes. I often use a brush or sponge, but sometimes I use my fingers. 

Step Three: Dust translucent powder along your forehead, nose and chin. 

Step Four: Take an angled bronzer brush, suck in your cheeks and sweep bronzer across the hollows of your cheeks. Then dab a bit on your temples. along your hairline and on the sides of your nose. You can also bronze under your chin. 

Step Five: Smiling in the mirror, use a brush in your cream blush and brush it onto your cheeks. 

Step Six: Use a spoolie brush or a lash/brow comb to groom your eyebrows up and in the direction which the hair grows. 

Step Seven: With one motion, drag your liner across your upper lid, winging it out slightly at the end. If you can rest your elbow something, you'll have an easier time keeping your hand steady. (More on this later)

Step Eight: Apply two coats of mascara horizontally and vertically. 

Step Nine: Dab on a little chapstick and you're done!

My look can work for you even if you look nothing like me. You might be able to just follow the steps above, but if your skin tone or features are drastically different, you will benefit from some modifications to follow. 

Next up, a video showing you how to work with a monolid. 


2013-11-16

My Everyday Make Up Essentials | Everyday Make Up


I like to try out as many new products in the never ending quest for finding the best beauty products out there, so I have a lot of make up. It took me a long time to work out how to whittle it all down to what I really essentially need. So, I keep these essentials in a zip up bag in my dressing table, where all my other make up products live in their own product category bags. (More on this later) I'm going to talk a little bit about them but I'm not going to name and shame (well, not shame) this time because I am always changing brands. I try and avoid certain ingredients (check out the list here on an older blog post - http://findyourbeautydevon.blogspot.co.uk/2013/09/ingredients-to-avoid.html 

SPF AND MOISTURISER: Before I apply my make up, I clean, tone and moisturise my face. Then I apply a layer of SPF. (My moisturiser dosen't have any!) 

LIGHTWEIGHT FOUNDATION: Since I try and go as bare as possible during the day, I use a lightweight foundation. I use a liquid foundation (mine does contain SPF funnily enough) I normally skin foundation the two days after tanning because that helps even out my skin. 

CONCEALER: Once my foundation is on, I go back in with my concealer and a brush to hide any redness.

UNDER-EYE CONCEALER: I also keep some under-eye concealer to hand in case it's needed. 

HIGHLIGHTER: I brighten the area under my eyes, which automatically wakes me up. 

BRONZER: I use this to add a sun kissed look and subtle contouring.

BLUSH: I use a cream blush and it goes onto the apples of my cheeks for a flushed look. 

LIQUID LINER: It's a favourite and always will be. I never feel right without a line of black winged out of the corner of my eye.

CHAMPAGNE EYE SHADOW: I don't wear coloured eye shadow in the day time because it makes me feel too done up but I do apply a champagne coloured eye shadow instead. 

TRANSLUCENT POWDER: A light dusting locks in my foundation so that it lasts hours longer and keeps my T-Zone from getting too shiny. 

MASCARA: Wouldn't leave home without a couple coats of on my lashes. I always go for black. Or falsies. 

LIPSTICK: I usually go for nudes and moisturising ones at that. 

Don't forget the application for all these products are in my previous posts. 

Introduction | Everyday Make Up


I rarely leave home without at least a little make up on. I just don't feel comfortable walking out and people seeing me without just a little coverage. My dark circles concealed, my blemishes hidden. I do enjoy putting on make up too much as well to not do it!

As dependent as I am on my foundation and mascara, I know what make up suits the daytime and what I can wear everyday. So if you did have the unfortunate even of seeing me waking up.. you'd still recognise me. 

Everyday make up shouldn't change how you look, it should just help get rid of any impurities on your face. 


St Tropez vs. St Moritz


Today I'm going to compare two of the great fake tan brands. I'm a fake tanner, I'm pale and I like to be just slightly bronzed. Not orange. I don't use sun beds, or professional spray tans. I just use mousses, at home. It sounds cliche but I enjoy it. I'm definitely not ready to embrace my pale yet. 

So who am I comparing? I'm comparing St Tropez's Self Tanning Mousse and St Moriz's Self Tanning Mousse. I don't have the St Tropez bottle anymore so I can't take a picture of the two side by side so I've just sourced some pictures in. 


THE PRICE:

So the St Tropez cost me a huge £30.69 from Superdrug.
And the St Moriz is just a £4.99 from Tesco

St Moriz wins on this one.

THE SMELL:

St Tropez's smell is a distinctive biscut, musky smell. I actually have grown to like it buut it lingers, even after your wash off in the morning. 

St Moriz's smell is only noticeable if you press your nose up to your skin and sniff. You can't smell it on you during the day. 

Once again, St Moriz wins. 

APPLICATION AND COLOUR:

St Tropez was my always my go to tanner that never failed me, but now I've tried St Moriz, it's definitely gone down in my books. The colour is a good bronze but it takes a few layered applications to get a noticeable glow. The mousse is easy to work with and you can see where it is being applied which is extremely helpful. It does dry quickly so as soon as it touches your skin, rub in! I've had the problem of putting it on, leaving it there for just seconds and it leaves a slightly darker outline of where it was.. I do recommend applying it three days in a row to get that sun kissed look. 

The first time I used St Moriz I was amazed. I didn't have high expectations because of the price and comparing it to my previous tanner. There's instant colour, which I love. I like the idea of applying it on a morning, waiting 4-6 hours and showering, and going out. It's really convenient. I feel it's application is really easy - it goes on smoothly and doesn't stain. It only takes one coat as well. 

So that's a clear winner for St Moriz!